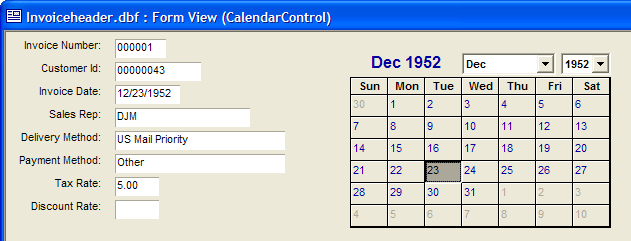
Using the Microsoft Calendar Control
Description
The following example shows how to use the Microsoft Calendar Control on a form. In this implementation the calendar control sets the value of the Invoice Date field and the Invoice Date field sets the value of the calendar.
Procedure
Put the form in design mode.
Use the following on the Toolbox to draw the boundaries of the control on the form.
In the resulting Insert ActiveX Control dialog, select the Calendar Control and click Insert.
Right click on the control and select Events > ActiveX Event.
Insert the following code into the AfterUpdate event. The field tied to the Invoice Date control is named idate. This script sets its value with the value of the ActiveX control.
dim dt as D
dt = topparent:ACTIVEX1.activex.value
' "" + dt turns the date value into a string.
topparent:idate.text = "" + dt
dim dt as D dt = topparent:ACTIVEX1.activex.value ' "" + dt turns the date value into a string. topparent:idate.text = "" + dt
Insert the following code into the OnChange event of the Invoice Date control ( idate field). It sets the value of the ActiveX control when idate changes.
topparent:ACTIVEX1.activex.value = ctodt(topparent:idate.text)
Insert the following code into the OnFetch event of the underlying form. It sets the values of the Invoice Date and ActiveX control when you read a different record.
dim t as P
dim dt as D
t = table.current()
dt = t.idate
topparent:ACTIVEX1.activex.value = dt

